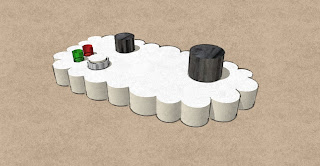
Designing a cloud shaped 3 dimensional object in Google SketchUp, using a sketch of the actual shape and adding additional features.
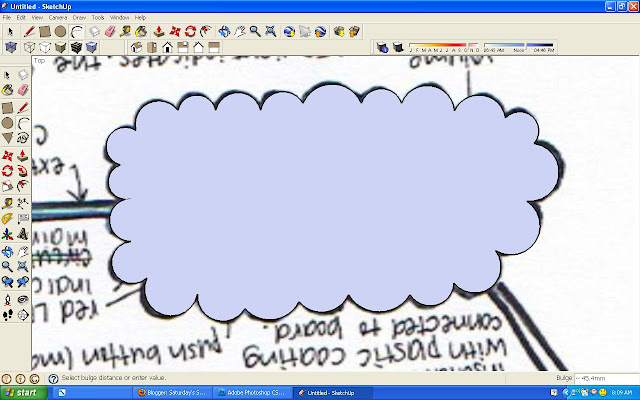
First open Google Sketchup and create a new file, select the top view in Views, and in the File menu select Import and import the .jpeg you are going to trace over place it carefully on the top view plane. and Lock on the ORIGIN
Magnify and enlarge your view to make it easier to trace around.
First try using the Free hand tool and trace over the sketch of the final design. When you have completed the trace of your object it should fill in as a grey object. Using the Hide menu to hide the .jpeg sketch (Edit menu) to check your shape.You may continue to work with this shape, but there is a more accurate way is to draw using the Arc tool.
The Arc tool is harder to manipulate, as the arcs do not always stay on the same plane when you are drawing them. The most import thing is to make sure that each arc you create is on the Endpoint of the previous arc. when you have finished the cloud use the Hide menu to hide the .jpeg sketch (Edit menu) to check your shape.
Unhide the background and hide the cloud you have created.
Using the Circle tool add in the features - buttons, you will get a dialogue box telling you you are creating shapes which intersect with a hidden object, just carry on as it is OK this is exactly what you want.
Finally Hide your .jpeg sketch and unhide the cloud.
Using the Extrude tool:
- the cloud is going to be extruded +25mm
- the 2 small LEDs -6mm
- the push button -5mm
- the volume control -2mm
- the timer control -10mm
If your sketch is in proportion but not to scale, then use the extrude tool an do by eye, this is still acceptable for the final 3 dimensional drawings, and even your orthographic views, add the dimensions on using another software.
Because we added shapes to the same plane you will notice the underside has holes. this can be overcome, but for this tutorial this will be ok.
So the orthographic views Exported as 2D Graphic and assembled using Photoshop. Notice I have altered the background by selecting the Hidden Line option and hiding all guides and axis. and moving away from the object enogh to limit the distortion.
Final orthographic views (BBC Bitesize)
If you want to group the cloud, select the whole cloud and save as a Group in the Edit. To Ungroup the cloud use Explode.
Final views of the "cloud controller", with and without shadows, and stylized using Assorted Styles (personally my favorite), then exported as 2d Graphics
With time this model could be refined, adding text, using components already created in the Google 3D Warehouse for example the LEDs.
Another way to create this cloud outline more accurately is to traceit using a vector drawing software such as Adobe Illustrator, or Xara, or download Serif DrawPlus and for US $9.99 you have an export to CAD features:


No comments:
Post a Comment